Want to learn spray painting?
This is a collection of tips, links, and tutorials I found most helpful at the beginning. In the hope that what I learned might help someone else as well, I have added it here.
Tips and techniques
The basics
Cap mounting.

When I first tried to get a cap on a can, I was quite glad that I didn’t do it inside. Just pushing down also opens the nozzle. The trick is to twist or «screw» the cap onto the can (which is at the same time the easiest way to get caps off a can again, which can be quite hard e.g. on sabotaz cans). Holding the cap so that one finger covers its dot provides additional security.
No clogging.

Just like any liquid paint, spray paint separates from the solvant after some time of standing around. (You will notice that for some cans the peas will not immediately fall down when turning it upside down after it has been standing around for several days.) The paint particles float to the bottom of the can, where they get aspirated by the pipe. This paint, which can now be much thicker, can clog caps (especially thin caps) very quickly.
Cans really need to be shaken hard for about a minute before using. Holding it upside down gets the paint particles back into the liquid quicklier.
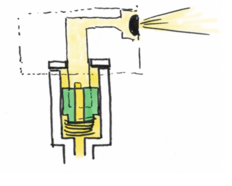
Hold your can vertically.

This is a basic rule. There is a little tube going to the bottom of the can. If you do not hold the can vertically, the tube may not reach the paint anymore, and everything you spray is propellant.
Do not hold your can vertically.
Hold it the way you feel comfortable. There is always more than enough paint in the can. You can even spray upside down for some seconds. Test yourself what works for you.
Thin lines.

The closer the distance to the wall, the thinner the line. To bring the can very close to the wall you need to tilt it.

Also, use an outline cap for thin lines. A fat cap will put so much paint on the wall that most of it will drip down. (Does not look cool.)

To get even thinner lines, additionally hold your can such that the upper side points towards the direction you are painting. I.e. hold the can vertically for drawing vertical lines, horizontally for drawing horizontal lines. You can get very sharp lines like that.

Obviously, spraying too long on the same place will leave drips as well. Very thin lines need to be painted quickly.
Soft fading shadows.

Spray about parallel to the surface of the wall. Close parts will fetch much more paint than distant ones.
In the image above, imagine half of the paint is above the center line and the other half is below. The second half has to cover a much larger area than the first one.
Tiny dots.
The problem with very small dots is that they cannot be controlled very well. If you tip the cap a little too hard or for a moment too long, then there will be so much paint on the wall that it will drip, and if you go further away to compensate this, the dot will become too large.
Yet it is possible. If you need a tiny dot, of about the diameter of your finger tip, for detailed work (like catchlights in an eye), here is how to do it without haste: Hold your can upside down and spray, as if you want to blow a cap clean. There is a moment where paint stops flowing and only, or mostly, propellant will be expelled. Stop spraying right at this moment. (Or a little before or after; run some tests before applying this technique :) )
If you hit the right moment, you can now (still holding the can upside down) spray a beautiful dot.
Filling.
A frequent tip, or rule, is to fill with lines, as shown in reskillmow’s tutorial. This sounds like some stupid education rule, but is not.
The point in releasing the cap after each line is to avoid patches with a thick layer of paint. Not only because it can drip, there is another, more important reason: Thick layers applied at once tend to get flaws when drying, or after some time when exposed to weather.
The point in covering with multiple thin layers instead of one think layer is the same. Thin layers are more stable (read: your graffiti will last longer), and they also dry faster than a thick layer where the solvent first needs to penetrate the paint layer until it can evaporate on the surface.
Common steps when painting a graffiti
Yours are free to differ
- Sketching with paper and pencil
- This is most often the place where ideas materialize. Mistakes can be undone with an eraser, shapes corrected
- Colourizing
- To get a basic idea of how the piece will look like. Especially for larger projects.
- Sketching on the wall
- In this step the outlines are transferred to the wall. Everything that is painted in this step will be covered in the following steps. The idea behind is to get the proportions right at the beginning and to know what comes where.
- Colours, filling
- Once the shapes are there, they are ready for filling with the appropriate colour.
- Outline
- Last step: Outlines, lines around shapes, to have a clear barrier between areas of different colour.
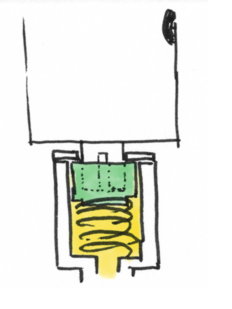
Internals of a can
Everything opened
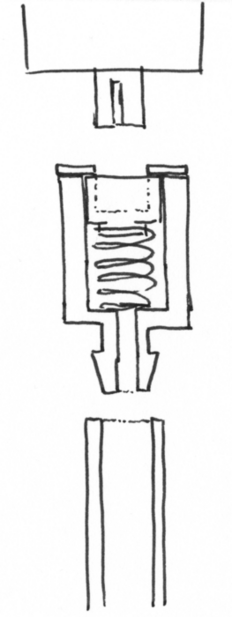
- Typical Molotow™ valve, also seen in the mtn 94.

Where does paint enter the cap? Well, it’s not the bottom hole in the stem of the cap, since this one is covered by a tiny component which holds the cap in position. It enters through the slit in the stem.
Let’s first examine this component (which is green for this valve) and my bad drawing skills.
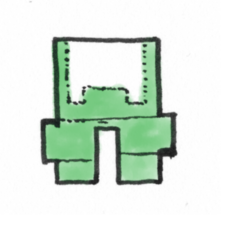
- Side view: The hole in the stem is covered by the upper part. There is also a slit at the bottom …

- Top view: … which allows paint to flow past also when this component is put into a pipe.

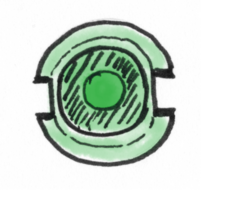
In basic state the slits in the side of the green component are covered by a rubber gasket against which the component is pressed by the spring.
- Cap inserted, but not pressed. The slits are covered by the gasket.

When pressing the cap, the rubber gasket does not cover the slits anymore, and the paint can reach the upper area and escape through the slit.
- Cap pressed. The slits in the green component are not covered anymore.

That’s the whole secret already. (Although it is not that easy to understand despite of its simplicity …) And since paint escapes through the slit, fat caps have a much wider one!
Graffiti
Past and future
Some background information about graffiti. Kind of a Must Read.
Graffiti History + Graffiti Language
Graffiti History + Graffiti Language
Another must-read is the Ultimate Graffiti Buyer’s Guide. Although not updated anymore recently, there is still tons of good information in it. Differences between caps, cans, and brands, for example.
Ultimate Graffiti Buyer’s Guide
Ultimate Graffiti Buyer’s Guide
Should I wear a mask? The linked page answers this question. A good mask consists of two filters; A particle filter against ordinary (and partially very hazardous) paint particles, and a chemical filter against biologic solvants. This PDF (German; See alsoproTherm for more information) suggests to use class-2 particle filters and class-2 orgainc filter, i.e. P2 and A2, for the 3M masks. Since the organic filter contains active carbon, they should be stored air-sealed. (See also this PDF.)
Writing and Your Health
Writing and Your Health
Solvants and other less healthy chemicals can also be resorbed over the skin. (For example, search for Xylol in this suva.ch PDF.) It therefore makes sense to wear gloves as well.
Video tutorials
Learning by watching
For me (ymmv), a good way to learn is to look at how other artists paint. For example: My letters look boring. So I look how others paint them. They use shadings, gradients, patterns …
Watching (video, or, better, real life) artists whose pieces you love will help you most. Artists you admire. For me, MadC is such an artist.
Some spray paint corporations feature artists (like for example their writer teams which officially paint for them) or show tutorials on vimeo.
There are very few tutorials on youtube. The only good collection I found so far:
- Miles Wickham, especially these two videos:
- Reskew Graffiti Tutorial #2 Spraypaint Techniques MWNYC
- Reskew Graffiti Tutorial #6 Letter Structuring Technique Essentials
Space paintings
A totally different technique

Space paintings work differently. Paint is added to (usually) a sheet of paper, in several layers, and removed again if needed, by using e.g. paper and scratching tools.
- http://www.spacepaintings.com/ with a list of videos here
- http://www.spraypaint.tv/
Airbrushing
A less different technique
This page shows various tricks about air brushing.
http://airbrushtricks.com/start/
http://airbrushtricks.com/start/
No comments:
Post a Comment